 |
dcc @ silicon junction |
Layout
The layout is a simple dog-bone layout in N scale. This was built back in 2000 when I was recuperating from eye surgery. It had been lying in storage for a few years. I ecently put it back together and it worked pretty well considering the handling it received while in storage.
Layout Design
Not wanting to clutter up the floor space, the layout is built to sit on top of a wall unit. It is way higher than eye level and this is one of the major drawbacks. It was built to keep things very simple and easy to build. It also shares the top of the wall unit with two stereo speakers and a centre speaker.
Layout Diagram
The baseboard is in four sections shown in blue - the two ends and the two straight sections connecting the two ends. The front-edge of the baseboard at each end projects out about 100 mm beyond the front edge of the unit. The old hi-fi speakers were too big and were on supports. The new ones are smaller and just stand on the layout doing a good job of weighing each end down. Transition curves are used at suitable places to reduce lurch.
The top of the wall unit is about 460 mm x 2800 mm. It is 1700 mm above floor level. A dog-bone seemed to be simplest shape that would fit the target area. This kept the initial construction and operation simple. A minimum turning radius of 280 mm(11") was be used. To fit the end loops, each end of the layout sticks out beyond the edge - crude but effective. One leg of the dog-bone runs along the front edge of the unit and the other along the back edge. The space between the two edges may become a yard in future.
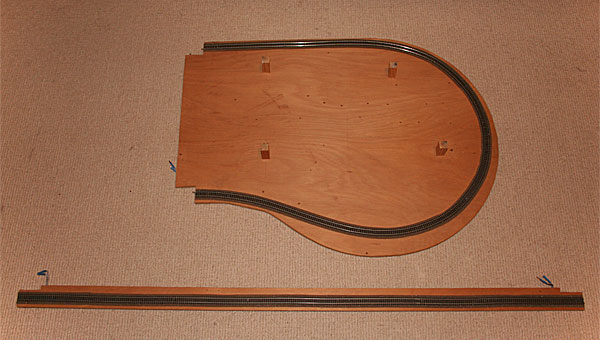
Top of the two types of modules

Bottom of the modules showing the
feeder cables
The baseboard was be designed to be modular. The two ends and the two long strips for the straights come apart and allow easy storage. The layout can also be easily expanded by rebuilding a module. I am planning on replacing the two strips with a single sheet. This will hold a yard. The layout will be taken apart and placed temporarily assembled on the floor when this is being done. Once completed, it will return to it place on top of the wall unit.
Construction
I had a suitable piece of 12 mm ply to make the baseboard. The track used is Peco flex track(SL-300 Code 80). I used Peco foam underlay which I had on hand. It doesn't look good and handles even worse but I had lots of it to use up and it would save some time.
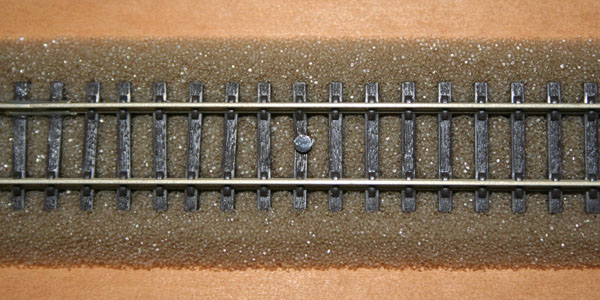
Top of the baseboard
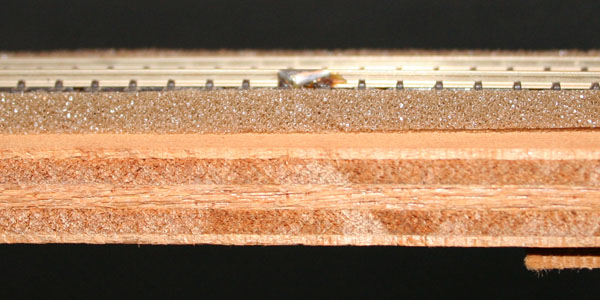
Side showing the rail, foam underlay and
baseboard
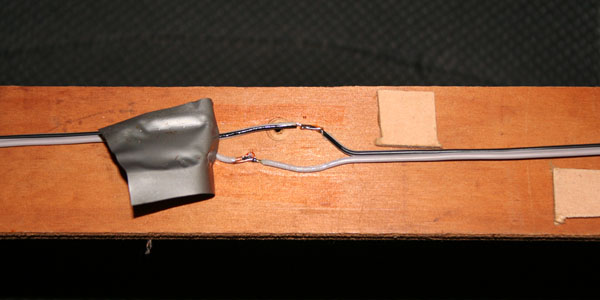
Bottom of the baseboard showing the feeder
cable
Using an additional layer over the baseboard to hold nails was avoided for aesthetic reasons and simplicity. Instead, I used a technique I've used before. Using a power screwdriver and a small chuck, I drill a 0.7 mm hole through the tie and into the ply. I then push an Atlas nail through the hole.
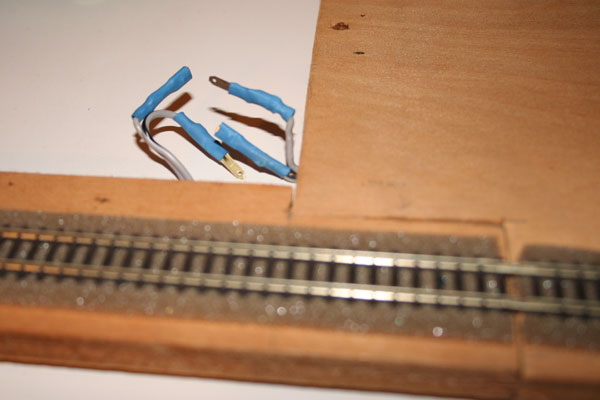
Two modules linked with connectors
(shown disconnected)
I glued small squares of 3 mm MDF under the baseboard to create a small gap between the baseboard and the top of the unit. This space is used for wiring. I might increase the space to 12mm. I used a thin speaker cable for the wiring. It is thick enough, comes in a figure 8 and has a black line indicating polarity. I run the wire along the track and attach feeders to the track at 400 mm intervals. This should reduce voltage drops along the track. I used connectors at places where two sections of baseboard meet so that the layout can be easily taken apart.
Rolling Stock
I started off buying decoders to fit into my locos. I took them apart and put them aside without installing the decoders. After a few years, I didn't know or feel like putting it back together. I ended up taking the lazy way out and buying locos with built in decoders. They seem to be the way to go these days.
Future Additions
The centre area of the layout will be replaced by a yard. Originally, I looked at mounting the Peco turnout motors above the baseboard but using Peco turnout motors mounted under the baseboard surface may be a better approach.
feedback
to  |